Setting Up an Instrument Track in Pro Tools
In this guide, we will show you how to create and manage tracks in your Pro Tools project. Follow the sections below to get started.
- Create Pro Tools tracks
- Create new track(s)
- Choose track type
- Select your I/O
- Mono or stereo tracks
- Mono aux or stereo aux tracks
- Track naming conventions
If you want to record in Pro Tools, you'll need tracks — audio, aux, MIDI, instrument, master, and video tracks. It seems simple enough — when you're ready to record something in Pro Tools, you need to create tracks on which to record. Here's how to create tracks in your sessions.
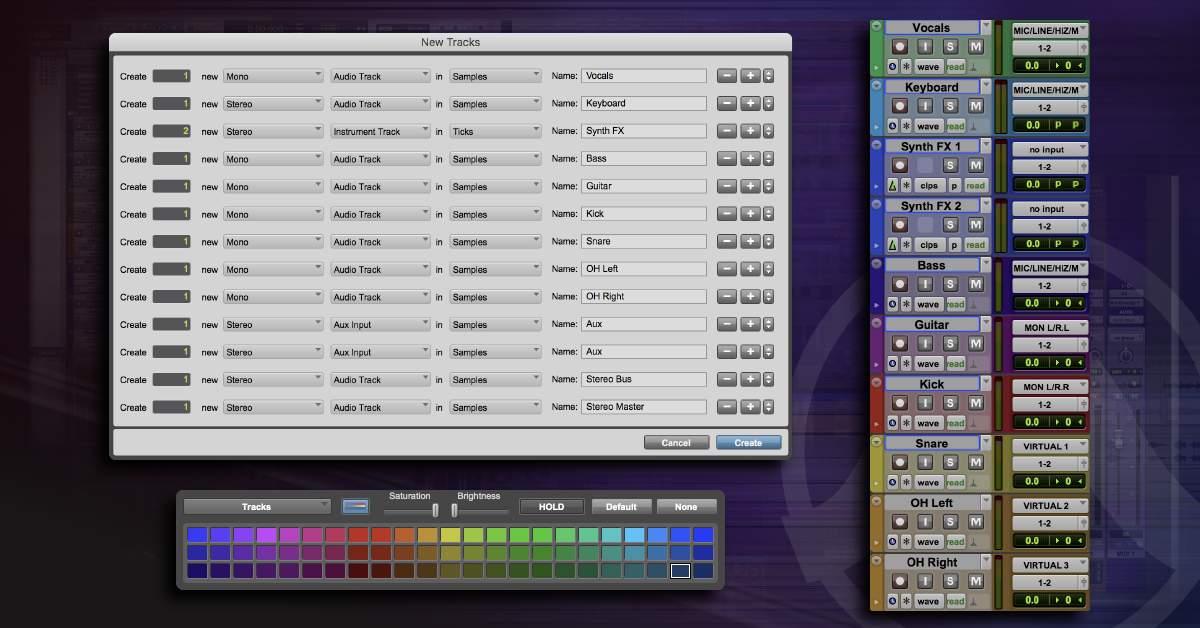
The simplest way to create tracks is to click on the Track tab in the menu bar, then select New. The New Tracks window appears. You can also hold Shift+Command+N to open the New Tracks window. In Pro Tools version 2019.5, you'll be prompted to name the track(s) once created.

Pro Tools New Tracks window.
Use this window to choose the number of tracks to create (using the number keys), as well as the type of track. The default is a mono audio track, but click on the left drop-down menu, and you'll see that you can choose not only a Mono or Stereo audio track, but also LCR (Left, Center, Right), LCRS, 5.0, 5.1, etc. (below). While the drop-down menu works just fine, you can hold the Command key and use the left and right arrow keys to toggle through the channel options.
Channel options and track type menus in Pro Tools.
Moving to the right drop-down menu, you'll find that audio tracks aren't the only things you can create — you can also create an Aux Input, a Master Fader, VCA Master, MIDI Track, Instrument Track, and even Video Track (above). You can scroll through the track options by holding the Command key and using the up and down arrow keys to toggle through the track options.
There are even Track Presets at the bottom of the right drop-down menu — you can build and save your own track settings (audio tracks, aux track, etc.). Do this by creating a track, adding plug-ins, sends, and I/O, then saving them as track presets (below). This allows you to create new tracks with those settings.
Saving a Track Preset in Pro Tools.
Your Pro Tools system will have a default I/O setup (you can see and alter the default via the Setup menu), and when you create new tracks, the output of each track will correspond to your main stereo output (it may be named A 1-2 or Main Left-Right — the specific name will depend on your own system). If you create multiple audio tracks in the same step, the inputs will step up sequentially from 1 to however many inputs your system has, and then repeat (below). If you create presets with a different I/O, then when you create a track based on one of those presets, it will be created with the inputs and outputs you specified.
Selecting inputs and outputs for your tracks.
RETURN TO TOP ↑
In most cases, choosing whether to use mono or stereo audio tracks is straightforward: if you're recording a single audio source — one microphone on a guitar amp, a vocal, or a bass track — you'll want to create mono audio tracks. Stereo audio tracks work great for sources such as electronic keyboards or microphones set up in a stereo configuration (for example, using an XY, ORTF, or Blumlein).
If, however, you are using multiple microphones on an instrument where the levels of each channel may need to be adjusted while mixing, such as overheads, some piano, and acoustic guitar recording setups, it's generally better to use two mono tracks. That way, you can deal with the sound of each microphone individually.
Another example where two mono tracks are better than a stereo track would be with an M-S, or mid-side, setup, which uses a cardioid-patterned microphone and a figure-8 mic on the same source, unless you are decoding with a stereo plug-in that can decode M-S.
7 Stereo Mic Techniques You Should Try
Learn more about how to use different types of mic techniques.
Though this article is primarily aimed at the early stages of recording, we should look at the best use of mono and stereo aux tracks. If you're sending a signal to an effects bus — for example, reverb or delay — creating a mono aux track will work great. If the plug-in generates a stereo output, Pro Tools will create a stereo output on the mono aux when you instantiate the plug-in. Create a mono aux track, and select a bus input. Insert the effect on the aux. Then go to the track you need to add the effect to and insert that bus input as a send. Adjust the level of the send, and adjust the output of the aux to the appropriate level (right).
Quite often, you'll want to send multiple audio tracks — all the drums or all the background vocals — through the same EQ or the same compressor. For this, create a stereo aux track. Set the input to a pair of buses (as an example, let's use Bus 15-16). Then select all the tracks you want to send through this aux, and set the output of each track to Bus 15-16 rather than the main outs. All these tracks will pass through the aux bus, so you can compress or equalize the whole group of tracks with one plug-in, as well as control the volume of all the tracks assigned to that aux (right).
RETURN TO TOP ↑
Get in the habit of naming your tracks as soon as you create them. It might seem faster, if you're in full creative mode, to simply add new tracks as you go, but sorting out what you did later is much easier if your tracks are named in a way that makes sense, rather than a session filled with tracks named "Audio 1," "Audio 2," and so on.
If you're consistent in your track naming conventions — not only in a single session, but across all your sessions — mixing will be much easier. It may help your workflow to name guitar tracks by their placement in the song — "VS Gtr" (Verse Guitar) and "CH Gtr" (Chorus guitar) for the parts that are played in the verses and choruses, which will make identifying your tracks very clear. If it makes more sense for you to refer to them as "Clean Gtr" and "Dirty Gtr," then by all means, go that way.
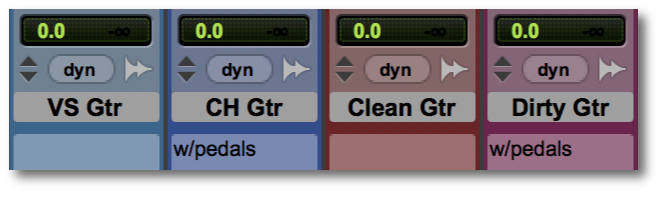
Examples of Pro Tools track names.
Since we often layer multiple guitars (which are often recorded with two microphones), it's not uncommon to have tracks labeled something with the mic name: "GTR 1 Royer" and "GTR 1 421." (If we double that guitar part, the labels would be "GTR 2 Royer" and "GTR 2 421.") If you're recording a song with, for example, three background vocal tracks, consider labeling them by part — BGV High, BGV Mid, and BGV Low — rather than simply by number. Remember that the goal is to be able to see what each track contains without having to solo it while the song plays, so naming each track as you create it will help to minimize confusion down the road.
RETURN TO TOP ↑
Related Articles
When you need help, Sweetwater has the answers!
Our knowledge base contains over 28,000 expertly written tech articles that will give you answers and help you get the most out of your gear. Our pro musicians and gear experts update content daily to keep you informed and on your way. Best of all, it's totally FREE, and it's just another reason that you get more at Sweetwater.com.

Setting Up an Instrument Track in Pro Tools
Source: https://www.sweetwater.com/sweetcare/articles/how-to-create-tracks-in-pro-tools/
0 Response to "Setting Up an Instrument Track in Pro Tools"
Post a Comment